
- All
- Product Name
- Product Keyword
- Product Model
- Product Summary
- Product Description
- Multi Field Search

Views: 172 Author: Site Editor Publish Time: 2026-07-16 Origin: Site


Modern office design heavily favors unbroken, minimalist ceiling planes. This architectural trend drives the demand to eliminate visual clutter using a high-end trimless ceiling light. Standard flanged fixtures simply cannot deliver this level of architectural integration, as their visible overlapping lips disrupt the continuous flow of the ceiling surface. However, specifying a Trimless Recessed Linear Light introduces significant structural, installation, and maintenance complexities compared to traditional lighting solutions. Poor specification often leads to cracked plaster, inaccessible drivers, and costly ceiling repairs that disrupt daily operations. You must carefully navigate these mechanical and spatial trade-offs to mitigate installation risks effectively. This technical evaluation guide helps architects, facility managers, and lighting designers shortlist fixtures based on rigorous engineering standards. You will learn how to balance seamless aesthetics with commercial-grade reliability, ensuring long-term performance in demanding environments.
Installation Coordination is Critical: Trimless fixtures require precise sequencing between electrical and drywall trades; mud-in flanges must be plastered perfectly to achieve a seamless look.
Maintenance Dictates Design: Prioritize fixtures with bottom-accessible components (removable reflectors, magnetic LED boards) to ensure drivers and arrays can be serviced without cutting into finished drywall.
Optical Performance Matters: In screen-heavy environments, selecting recessed office lighting with a Unified Glare Rating (UGR) of <19 is essential for employee comfort and productivity.
Plenum Space Dictates Selection: Housing dimensions and thermal clearance requirements must be verified against the available ceiling cavity before finalizing any specification.
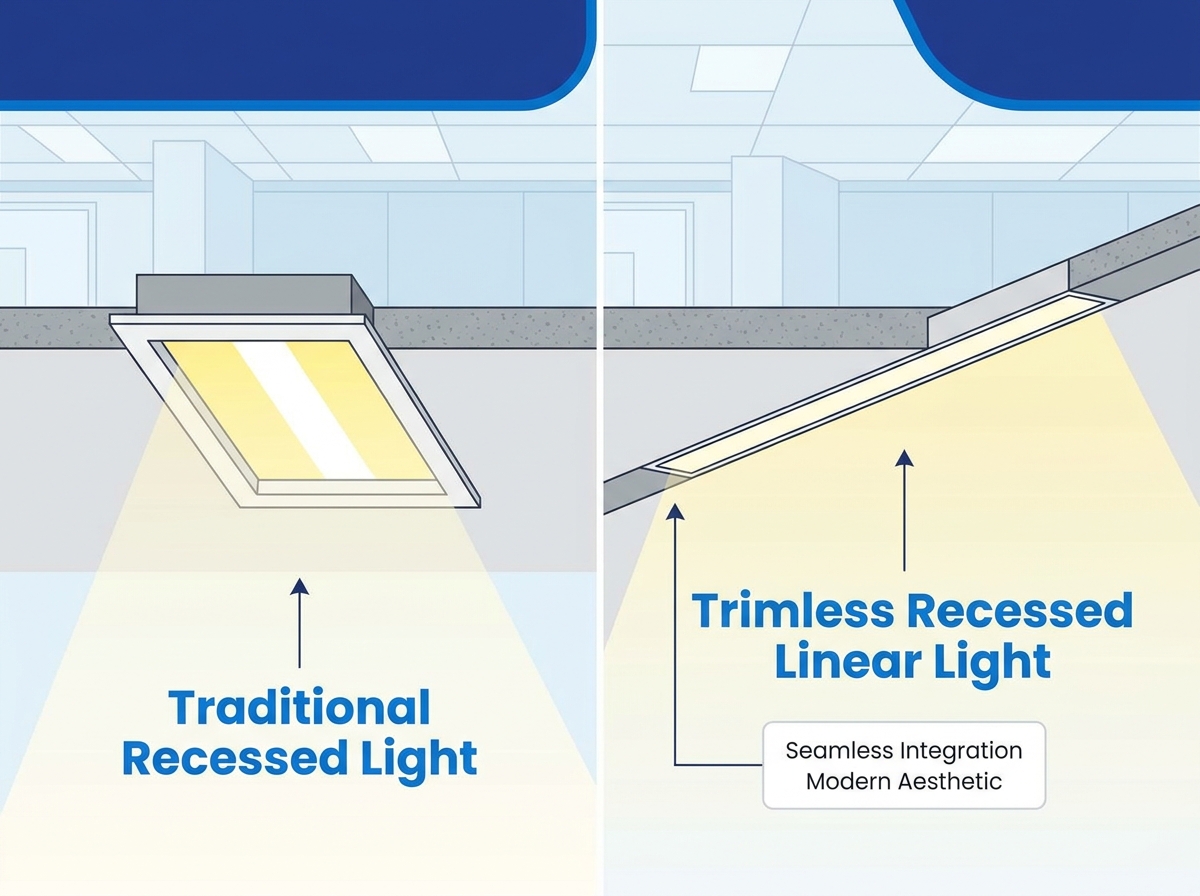
Flanged fixtures feature a visible trim ring that rests on the surface of the ceiling. This lip hides rough drywall cuts and minor installation errors, making them forgiving for contractors. Trimless fixtures eliminate this overlapping lip entirely. They utilize a specialized mud-in or plaster-in flange system constructed from perforated aluminum. Installers screw this perforated flange directly to the ceiling joists or the edge of the drywall cutout. Drywall compound is then applied over the flange, filling the perforations to create a strong mechanical bond. Once sanded and painted, the plaster sits completely flush with the light aperture. The ceiling appears to flow directly into the light source, creating a monolithic architectural element. This requires a high degree of precision, as any deviation in the framing or drywall finishing will be immediately visible along the straight edge of the extrusion.
Early iterations of trimless lighting presented massive maintenance hurdles for facility teams. Legacy designs often trapped drivers and complex wiring behind sealed plaster. When a component failed, maintenance teams had to cut into the finished drywall to access the electrical housing. This destructive process required patching, sanding, and repainting the ceiling, turning a simple repair into a multi-day construction event. Modern modular systems have solved this critical flaw through intelligent mechanical engineering. Today, architects specify fixtures featuring toolless removable reflectors and snap-in light engines. Accessible wiring channels allow technicians to reach internal components easily. You can service the entire fixture from below without touching the surrounding plaster. Magnetic gear trays and quick-connect wiring harnesses have further streamlined this process, allowing for rapid component swaps.
Commercial applications demand strict performance baselines that go beyond mere aesthetics. You need continuous illumination without visible dark spots at the module joints, which requires precision-engineered light leak shields and overlapping diffusers. Rigid aluminum extrusions are mandatory to prevent warping over long runs, especially when subjected to thermal cycling. The system must achieve flawless architectural integration while maintaining structural integrity. You face a clear conceptual trade-off during the specification phase. You accept higher upfront installation complexity, tighter tolerances, and increased coordination between trades. In exchange, you gain premium architectural aesthetics that elevate the entire workspace. To illustrate the differences, consider the mechanical variations between standard and trimless systems.
Feature | Standard Flanged Fixture | Trimless Mud-In Fixture |
|---|---|---|
Visual Appearance | Visible overlapping lip on ceiling | Flush, seamless integration |
Installation Tolerance | High (lip hides rough cuts) | Extremely Low (requires precision) |
Drywall Finishing | Standard taping around fixture | Level 5 finish over perforated flange |
Maintenance Access | Drop lens or remove entire fixture | Bottom-up access via magnetic trays |
Structural Rigidity | Moderate | High (acts as part of the ceiling plane) |
Standard 5/8-inch drywall ceilings accommodate most mud-in profiles easily, providing enough depth for the flange to sit flush. Acoustic panels or wood-slat ceilings require entirely different mounting hardware and cannot utilize traditional mud-in flanges. Plaster finishing compatibility is crucial for a flawless result. The fixture flange must integrate perfectly with a Level 5 drywall finish to prevent any visual disruption. Skim coating requires specific plaster depths over the perforated flange, usually around 1/16 to 1/8 of an inch. Improper depths cause shadowing or visible cracking along the extrusion edge as the building settles. Housing dimensions dictate feasibility in the field. You must measure the depth and width of the fixture housing against the as-built conditions. Older buildings often suffer from limited plenum space. Dense HVAC routing, fire sprinklers, and plumbing restrict the available cavity. Verify thermal clearance requirements before finalizing any specification, ensuring the housing has adequate airspace to dissipate heat.
Ceiling height directly dictates the specification of a seamless linear light. Higher ceilings demand narrow beam angles and higher lumen outputs to push light down to the desks effectively. Lower ceilings require wider light distribution to avoid intense hot spots on work surfaces and to ensure adequate vertical illumination on walls. Room layout influences fixture length and continuous-run configurations. You must calculate the overall spacing criteria carefully using photometric software. Proper spacing maintains uniform lux levels across all workplanes, preventing shadows and dark zones. Avoid placing long runs directly over highly reflective surfaces like glass conference tables, which can cause secondary glare. The orientation of the linear runs should also align with the primary viewing angles of the occupants to minimize visual discomfort.
Lens selection determines the visual comfort of the space and the overall efficiency of the luminaire. Opal lenses provide soft, diffused illumination but reduce total output by trapping light within the housing. Micro-prismatic lenses offer superior glare control while maintaining higher efficacy, making them ideal for task-oriented spaces. Louvered designs aggressively cut off light at high angles, providing the highest level of visual comfort. Strict glare control is non-negotiable in open-plan offices and conference rooms. You must specify recessed office lighting with a Unified Glare Rating under 19. This prevents eye strain in screen-heavy environments where employees spend hours looking at monitors. Color temperature consistency matters immensely across long continuous runs. Specify LED boards with tight MacAdam ellipses (typically 2-step or 3-step SDCM) to ensure uniform color from one end of the run to the other.
Lens Type | Light Distribution | Glare Control (UGR) | Best Application |
|---|---|---|---|
Opal / Frosted | Wide, Diffused | Moderate (UGR 22-25) | Corridors, Breakrooms |
Micro-Prismatic | Controlled, Directional | Excellent (UGR <19) | Open Offices, Desks |
Baffle / Louver | Highly Restricted | Superior (UGR <16) | Conference Rooms |
Asymmetric | Wall Wash | N/A (Directional) | Whiteboards, Art Walls |
Integral drivers sit directly inside the fixture housing. This simplifies the initial wiring process, as the electrician only needs to bring line voltage to the fixture. However, integral drivers increase the overall depth and width of the extrusion, which can be problematic in shallow plenums. They also trap heat near the LED arrays, potentially reducing the lifespan of the diodes. Remote drivers sit in a separate, accessible electrical panel or ceiling hatch. Remote configurations allow for much slimmer fixture profiles, sometimes as shallow as two inches. They improve thermal management by moving the heat source away from the diodes. Long-term serviceability improves drastically when drivers are centralized in a remote utility closet, allowing maintenance teams to swap power supplies without setting up ladders in the middle of the office.
Skepticism surrounds any mud-in ceiling fixture among experienced facility managers. They rightly worry about component failure after the ceiling is finished and painted. LED boards degrade over time, losing lumen output and shifting in color temperature. Drivers fail due to voltage spikes, thermal stress, or standard end-of-life degradation. If the fixture lacks proper access, a simple driver replacement becomes a major construction project. Dust, noise, and workspace disruption follow any destructive ceiling repair. The cost of hiring a drywall contractor to patch and paint a ceiling far exceeds the cost of the replacement driver itself. Therefore, specifying fixtures with guaranteed accessibility is the most critical step in the design process.
Commercial specification requires mandatory bottom-up maintenance features to protect the facility's operational budget. Look for snap-in diffusers and removable gear trays that can be extracted without specialized tools. Magnetic LED boards allow for rapid, tool-free replacement, snapping securely into the aluminum extrusion. Modern trimless systems empower technicians to replace drivers and LED arrays entirely from below the ceiling plane. You simply remove the lens, drop the internal tray, disconnect the quick-wire harness, and swap the components. The plaster finish remains completely undisturbed during routine maintenance. Safety tethers should be specified on all removable trays to prevent components from falling on technicians during service operations.
The pre-installation phase determines the final visual quality of the installation. Accurate marking and joist coordination are essential to ensure the fixture does not conflict with structural members. Installers must cut precise rough openings in the drywall, maintaining a tight tolerance around the extrusion. Misalignment during the cutout stage compromises structural integrity and forces the drywallers to use excessive mud to fill gaps. Uneven gaps result in inconsistent mud-in margins, which can lead to cracking later. The drywall contractor and the electrical contractor must review the layout together before cutting begins, establishing clear lines of responsibility for the rough opening dimensions.
Trimless fixtures demand a strict, phased workflow that requires excellent project management. Out-of-sequence work will ruin the installation.
The electrician pulls the rough-in wiring to the designated fixture locations, leaving adequate slack for final connections.
The aluminum housing is secured to the framing or suspended via threaded rod, ensuring it is perfectly level and aligned with laser guides.
The drywall team hangs the gypsum board tight to the fixture edge, minimizing the gap between the board and the extrusion.
Tapers apply specialized joint compound over the perforated flange, embedding fiberglass mesh tape to prevent cracking, and feathering it out smoothly into the ceiling plane.
After sanding, priming, and painting the ceiling, the electrician returns to the site.
The electrician inserts the final LED gear trays, connects the wiring harnesses, and snaps the optical lenses into place.
Building settling causes plaster to crack over time, especially in new construction. Thermal expansion of the aluminum extrusions presents another major risk for continuous linear runs. As the lights heat up during operation and cool down at night, the metal expands and contracts. You must evaluate mitigation strategies carefully to protect the plaster finish. Use specific flexible joint compounds designed for dissimilar materials rather than standard drywall mud. Apply fiberglass mesh tape over the flange joints to provide tensile strength. Specify fixtures equipped with engineered expansion joints for exceptionally long continuous runs (typically anything over 24 feet). These expansion joints absorb the movement of the aluminum without transferring stress to the surrounding plaster.
Residential-grade solutions often rely on basic aluminum channels paired with adhesive LED tape. These extrusion kits offer maximum flexibility for custom residential shapes and are generally inexpensive. However, they lack the durability, optical control, and thermal management required for commercial spaces. Pre-engineered fixtures are mandatory for office recessed linear lighting. They provide necessary UL listings, predictable lumen outputs, and tested photometric data. Pre-engineered systems guarantee rigid structural integrity, preventing the housing from twisting during installation. They also feature heavy-gauge aluminum that provides superior thermal dissipation, ensuring the LED boards achieve their rated lifespan.
Modular systems allow designers to create complex L-shapes, U-shapes, or wall-to-ceiling transitions that define the architectural space. Evaluate the capability of the specific system to handle these geometries without compromising the seamless look. Factory-welded corners ensure perfect alignment and structural rigidity. Precise engineering is required to prevent light leaks at corner junctions, often utilizing overlapping light shields or custom-cut LED boards that carry illumination all the way into the vertex. Field-cut corners rarely achieve the seamless look required in high-end office environments and should be avoided in favor of factory-fabricated intersections.
Trimless recessed linear lights offer unmatched architectural elegance for modern offices, providing clean lines and unobtrusive illumination. However, their success hinges entirely on proactive coordination between trades and strict specification of serviceable components. Decision-makers should filter options first by plenum depth compatibility, ensuring the physical housing fits within the ceiling cavity. Next, verify bottom-up serviceability features to protect long-term maintenance budgets. Finally, confirm optical performance and glare control ratings to ensure occupant comfort.
Consult with a lighting designer to run accurate photometric calculations for your specific room layout and ceiling height.
Request a physical mockup of the mud-in flange to verify compatibility with your drywall contractor's finishing techniques and preferred joint compounds.
Verify warranty terms and ensure all internal components, including drivers and LED boards, are easily accessible from below the ceiling plane.
Confirm the available plenum depth and HVAC routing before finalizing any remote or integral driver configuration.
A: Yes, but it requires cutting the drywall, installing the housing, and re-plastering and repainting the entire ceiling section. This makes it highly disruptive for retrofits compared to new builds.
A: You remove the friction-fit or magnetic lens to access the internal gear tray from below. This allows you to swap components without causing any drywall damage.
A: Standard ranges are typically 3 to 5 inches. This depends heavily on whether the driver is integral or remote. Always check manufacturer spec sheets for exact thermal clearances.
A: Thermal expansion can cause cracking. Proper mud-in techniques, using fiberglass mesh tape, and selecting high-quality rigid extrusions effectively mitigate this risk.
A: True trimless mud-in fixtures are designed exclusively for hard ceilings like drywall or plaster. Drop or T-grid ceilings require specific grid-compatible architectural linear fixtures instead.


