
- All
- Product Name
- Product Keyword
- Product Model
- Product Summary
- Product Description
- Multi Field Search

Views: 0 Author: Site Editor Publish Time: 2026-07-05 Origin: Site


Commercial interior design constantly wrestles with a specific challenge. Architects want clean, continuous sightlines. Lighting engineers demand strict visual comfort and high lux levels. Collaborative workspaces often suffer when these two priorities clash. Improperly sized fixtures create severe screen glare. Poorly specified optics lead to occupant fatigue and massive energy waste. Residential rules of thumb simply fail under the rigorous demands of commercial task illumination.
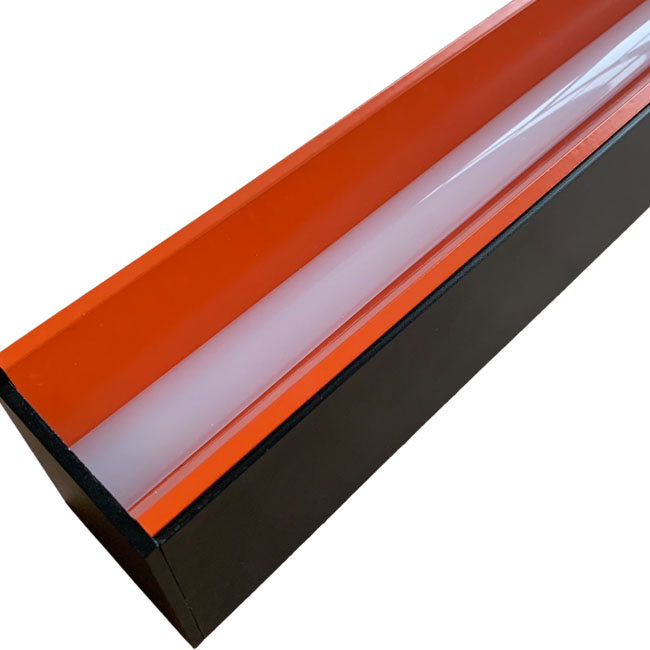
A 1200mm DALI LED Pendant Light solves this exact problem. This specific linear form factor, paired with Digital Addressable Lighting Interface (DALI) control, establishes the industry-standard baseline for modern boardrooms. It provides a reliable framework for evaluating dimensions, optical performance, and system integration. Proper sizing ensures uniform light distribution across the working plane while maintaining architectural harmony.
Standard commercial meeting rooms require precise spatial planning. Point-source downlights frequently fail here. They create harsh shadows on faces and uneven illumination across the working plane. Success means delivering uniform light exactly where people read documents and interact with laptops. The light source must match the geometry of the task area. When you walk onto a job site, the first thing you notice is how ceiling grids dictate fixture placement. If you rely on standard 600x600mm troffers, you often end up with light spilling onto the walls instead of the table. A linear approach focuses the lumens exactly where the work happens.
Contractors and lighting designers know that meeting spaces are high-stakes environments. If the lighting is off, the client complains immediately. The success criteria for these rooms include a minimum of 500 lux on the desk surface, minimal glare on presentation screens, and a clean ceiling aesthetic. Achieving this requires a fixture that spans the primary working zone without overwhelming the room's volume.
A 1200mm length aligns perfectly with the human field of vision. It matches standard commercial table dimensions seamlessly. Physical fixture profiles matter immensely. A standard 65mm height offers a sleek visual mass. Thicker profiles disrupt ceiling clearance and architectural integration. Slimmer profiles might struggle to house internal drivers. The 1200mm length strikes the perfect balance between presence and subtlety.
When specifying profiles, you have to consider the internal components. A fixture that is too slim forces you to remote-mount the DALI driver. Remote mounting adds labor time. You have to run low-voltage cables through the ceiling plenum and find an accessible location for the driver box. A profile that accommodates an internal driver simplifies installation. The 1200mm length provides enough internal volume to house high-quality DALI drivers and emergency battery packs without looking bulky.
Directional light distribution defines workspace quality. Linear profiles push light evenly along the length of rectangular boardroom tables. Circular pendants concentrate light in the center, leaving the ends dark. Proper meeting room lighting requires consistency across every seat.
| Feature | Linear Pendant (1200mm) | Circular Pendant |
|---|---|---|
| Light Distribution | Even spread along rectangular surfaces | Concentrated center, dark edges |
| Architectural Alignment | Matches table geometry perfectly | Clashes with long tables |
| Shadow Mitigation | Reduces hand and head shadows | Creates harsh directional shadows |
| Installation Complexity | Standard two-point suspension | Often requires multi-point leveling |
| Driver Housing | Ample linear space for internal drivers | Often requires remote drivers |
Lighting layouts change based on room type. Executive boardrooms often use continuous linear runs. Multi-purpose training rooms require spaced, parallel installations. Compact huddle spaces thrive with a single 1200mm fixture. Scaling the lighting requires understanding the specific function of the space.
In a training room, desks move around. You cannot tie the lighting layout to a single fixed table. Here, you space the 1200mm fixtures evenly across the ceiling grid to provide uniform ambient light. In a dedicated boardroom, the table never moves. You center the fixture directly over the wood veneer. This application-specific approach prevents costly rework after the client moves into the space.
Commercial spaces rely on the 1/2 to 2/3 rule. The fixture length should equal one-half to two-thirds of the table length. A 1200mm fixture fits mathematically perfectly over tables ranging from 1800mm to 2400mm. This ratio ensures proportional aesthetics and functional light spread.
If you install a fixture that matches the exact length of the table, it looks heavy and oppressive. It also throws light past the table edges, causing glare for people walking around the room. The 1/2 to 2/3 rule keeps the light source contained within the visual footprint of the furniture. This is a hard rule on commercial job sites.
Residential design uses the "Feet-to-Inches" rule. You add room length and width in feet to get fixture diameter in inches. Commercial design ignores this. You must size the fixture to the table, not the room. Room volume sizing works only as a secondary ceiling scale check. Direct desk lux requirements always dictate the primary specification.
I have seen contractors try to center a massive fixture in a large room with a small table. The result is terrible. The light hits the floor instead of the work surface. Always measure the table first. The room dimensions only matter for calculating the secondary ambient lighting, like perimeter wall washers or downlights.
Light levels drop at the table edges. A 1200mm length mitigates severe shadowing for users seated at the ends of a standard table. Acceptable edge falloff keeps the entire working surface usable. If the fixture is too short, the end seats become unusable for reading.
You want a smooth gradient. The center of the table might hit 600 lux, while the edges drop to 450 lux. This is acceptable. If the edges drop below 300 lux, people will strain their eyes. The 1200mm length, combined with a wide beam angle optic, pushes enough light to the ends of a 2400mm table to maintain compliance.
Mounting height dictates visual comfort. The baseline measurement is 750mm to 900mm above the table surface. This translates to roughly 1500mm to 1650mm from the finished floor. This height maximizes light on the desk while keeping the source out of direct eye lines.
When you hang the fixture, you measure from the finished floor to the bottom edge of the luminaire. Do not measure from the ceiling down. Ceiling heights vary due to HVAC ducts and structural beams. The floor is your constant reference point. Set your laser level at 1600mm and align the bottom of the fixtures to the laser line.
Ceiling heights alter suspension cable requirements. A standard 2.7m ceiling requires a short drop. Exposed 3.5m ceilings demand longer suspension cables. The perceived fixture scale changes with height. Longer cables require thicker gauges to prevent swaying.
In spaces with exposed concrete soffits, HVAC drafts can cause pendants to swing. If you have a drop longer than 1.5 meters, you need to specify rigid stem mounts or use aircraft cable with a stabilizing cross-wire. Swaying fixtures create moving shadows, which distract occupants during meetings.
You must mount the fixture above the seated eye level. This maintains unobstructed views across the table. Participants must see each other and presentation screens clearly. A fixture hung too low ruins the collaborative environment.
Have someone sit at the table during the final height adjustment. If the fixture blocks their view of the person opposite them, raise it. The 750mm to 900mm rule usually clears the line of sight for a 95th percentile adult male, but field verification is always the best practice.
Extended conference tables for 14 or more people require multiple fixtures. You calculate spacing by maintaining the 1/2 to 2/3 coverage ratio across the total table length. Divide the table into zones and assign a 1200mm fixture to each zone.
For a 4800mm table, you would use two 1200mm fixtures. You space them so the gap between them equals half the length of one fixture (600mm). This creates a continuous pool of light on the table without the expense of a custom 3000mm extrusion.
Continuous end-to-end runs create a strong visual line down the center. Parallel mounting works better for extremely wide tables. The choice depends entirely on room width and table configuration. Both methods require precise alignment during installation.
If you run fixtures end-to-end, use mechanical joiners. Do not rely on eye-balling the alignment. A 2mm gap at the ceiling translates to a noticeable dog-leg at the fixture level. Mechanical joiners lock the extrusions together, ensuring a perfectly straight line.
The Unified Glare Rating (UGR) measures discomfort glare. A rating of <19 is the legal requirement for office environments in many jurisdictions. High glare causes headaches and reduces productivity. Specifying an anti glare linear pendant is non-negotiable for commercial compliance.
UGR is calculated based on the background luminance, the luminance of the luminaires, and the solid angle of the luminaire seen by the observer. You cannot just guess this number. You need the photometric data from the manufacturer. If an inspector asks for your lighting calculations, you must prove the UGR is below 19.
High-end fixtures use specific hardware to achieve low glare. Micro-prismatic diffusers scatter light effectively. Baffle louvers hide the LED chips from direct view. These solutions maintain high lumen output while keeping the UGR strictly below 19.
Opal diffusers look nice but they scatter light everywhere, often pushing the UGR above 22. Micro-prismatic covers use tiny geometric shapes to direct the light downward. Baffle louvers are even better. They physically block the light from hitting your eye at shallow angles. When you look across the room, a louvered fixture almost looks turned off.
A 4000K office pendant represents the benchmark for commercial workspaces. It balances neutral white light with high color rendering. This ensures accurate color representation during presentations. It keeps occupants alert without feeling sterile.
3000K is too warm and makes people sleepy. 5000K is too blue and feels like a hospital. 4000K hits the sweet spot. It makes white paper look crisp and keeps skin tones looking natural on video calls. Always specify a Color Rendering Index (CRI) of 90 or higher alongside the 4000K temperature.
Some environments require dynamic adjustments. Tunable white options within DALI systems allow the 4000K baseline to shift throughout the day. This supports natural circadian rhythms, though 4000K remains the standard fixed target.
If you install tunable white fixtures, you need DALI Type 8 (DT8) drivers. Standard DALI drivers only handle dimming. DT8 drivers handle both dimming and color temperature on a single address. This saves programming time and reduces the number of addresses used on the DALI loop.
Commercial standards demand 500 lux on the meeting table surface. A properly sized 1200mm fixture hits this target efficiently. You must calculate the lumen output and beam angle to guarantee 500 lux at the working plane.
Do not confuse source lumens with delivered lumens. A fixture might produce 4000 lumens at the LED board, but after passing through the diffuser, it only delivers 3000 lumens. Always base your calculations on delivered lumens. Use a light meter during commissioning to verify you hit the 500 lux target.
Fixtures offering a 70/30 or 80/20 direct-to-indirect light distribution perform best. The upward light illuminates the ceiling cavity. This reduces the cavern effect and lowers contrast ratios, significantly improving overall visual comfort.
If the ceiling is dark, the bright fixture creates massive contrast. This tires the eyes quickly. Pushing 20% of the light up washes the ceiling, softening the contrast. Make sure the ceiling is painted a highly reflective matte white to maximize this indirect bounce.
A DALI pendant light operates differently than standard phase-cut or 0-10V dimming. DALI allows you to address, configure, and monitor each physical fixture individually over a single control loop. This two-way communication provides precise diagnostic data.
With 0-10V, you run a low-voltage wire to a group of fixtures. They all dim together. With DALI, you run a two-wire bus to up to 64 devices. You can tell fixture number 12 to dim to 50% while fixture number 13 stays at 100%. This granularity is essential for modern office layouts.
DALI allows administrators to regroup fixtures via software. You alter lighting zones without physical rewiring. When meeting room partitions move, the lighting adapts instantly through the control interface.
In the past, if a client split a large boardroom into two smaller rooms, an electrician had to pull new switch legs. Now, the facility manager just opens the DALI software and assigns the fixtures to new groups. This saves thousands of dollars in renovation costs.
Practical use cases require scene setting. "Presentation Mode" dims the fixtures near the screen. It maintains task lighting at the back of the table. DALI handles these complex transitions smoothly and reliably.
You program these scenes during commissioning. Scene 1 is "All On" at 100%. Scene 2 is "AV Mode" where the front fixtures drop to 10% and the rear fixtures stay at 70%. The user just presses a button on the wall panel, and the DALI controller executes the fade rates perfectly.
DALI drivers interface directly with ambient light sensors. They automatically dim the 1200mm fixture when natural daylight floods the room. This daylight harvesting drastically reduces energy consumption.
Place the daylight sensor near the window, but not looking directly outside. It needs to measure the light hitting the desk. As the sun comes up, the DALI system slowly dims the artificial light. The occupants never notice the transition, but the energy meter does.
This automated integration aids in meeting strict commercial energy codes. Standards like ASHRAE, Title 24, and BREEAM require automated lighting controls. DALI provides the necessary infrastructure to pass these inspections.
Building inspectors will test this. They will shine a flashlight at the daylight sensor and watch the fixtures dim. They will walk out of the room and time the occupancy sensor. DALI systems pass these tests easily because the parameters are digitally locked in the software.
Mounting heavy linear fixtures presents challenges. Suspended grid ceilings require different hardware than exposed concrete soffits. Grid ceilings often lack the structural integrity for heavy pendants without additional support.
Never hang a pendant directly from the acoustic tile. You must tie the suspension cables to the true structural ceiling above the grid. Use independent support wires. If the grid fails, the fixture must remain hanging from the concrete deck.
Specify reinforced mounting points early in the design phase. Use appropriate ceiling roses or canopies that hide DALI control gear. If remote mounting the drivers, ensure cable length limits are strictly observed.
DALI bus wires can run up to 300 meters depending on the wire gauge. However, the DC output from a remote driver to the LED board has strict distance limits to prevent voltage drop. Keep remote drivers within 2 meters of the fixture using 1.5mm squared cable.
LED flicker at low dimming percentages ruins video conferences. Specifying high-quality DALI-2 certified drivers mitigates this risk entirely. DALI-2 ensures smooth, flicker-free dimming down to 1%.
Cheap drivers use low-frequency Pulse Width Modulation (PWM). Cameras pick this up as banding or flickering on the screen. High-end DALI-2 drivers use high-frequency PWM or Constant Current Reduction (CCR). This keeps the light stable on camera, even at 5% output.
DALI installations require a 5-core cable setup (Live, Neutral, Earth, DA, DA). Retrofitting older buildings without proper infrastructure causes major delays. Verify the existing wiring before specifying DALI fixtures.
You can run the DALI bus wires in the same conduit as the mains power. They are polarity-free, which means the electrician cannot wire them backward. However, if the existing building only has 3-core cable, you have to pull new wire. Check the ceiling plenum before ordering the fixtures.
A 1200mm DALI LED Pendant Light stands as the most versatile and ergonomically sound choice for standard commercial meeting spaces. It aligns with table geometry, meets strict glare requirements, and integrates seamlessly with advanced control systems.
A: A 1200mm fixture is mathematically ideal for tables ranging from 1800mm to 2400mm in length. This allows for a 300mm to 600mm inset from the table edges, ensuring even light distribution across the entire working surface without severe edge falloff.
A: No. While the room dimension rule provides a quick sanity check for spatial scale, commercial meeting environments must prioritize the table-to-fixture ratio. Task-plane lux levels and visual comfort dictate the specification, not decorative room-volume rules.
A: Mount the fixture 750mm to 900mm above the desk surface. This translates to roughly 1500mm to 1650mm from the floor. This height prevents line-of-sight obstruction while maximizing lux levels on the working plane.
A: DALI provides two-way digital communication. It allows for individual fixture addressing, software-based regrouping without rewiring, and seamless scene-setting for presentations. 0-10V is analog, one-way, and lacks individual fixture control on a shared circuit.
A: No. 4000K refers to the color temperature (neutral white), not the brightness (lumens). DALI control allows you to dim the lumen output to suit the small space while maintaining the crisp, alert 4000K color temperature required for task visibility.


